
1. Introduction
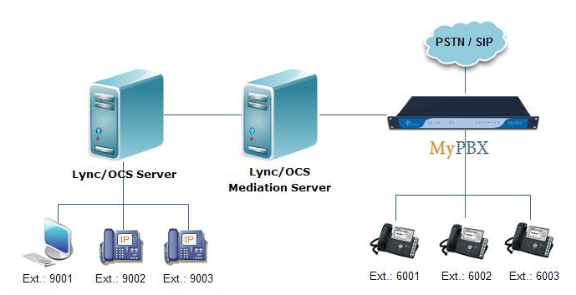
This is the guide to the integration of Microsoft Office Communication Server and MyPBX. It will offer the connection between Office Communicator users (OC users) and MyPBX so that the users can have access to the extensions, inbound or outbound routes of MyPBX.
Flowchart:
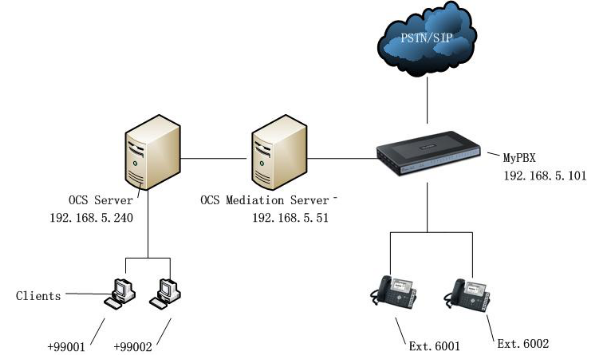
OCS server: 192.168.5.240
OCS Mediation Server: 192.168.5.51
MyPBX: 192.168.5.101
MyPBX Extension numbers: “6001” to “6099”
Office Communicator user virtual number: “+99001” to “+99099”
After the configuration:
1. The OC user can call the extension of MyPBX by dialing “6001” to “6099”.
2. MyPBX extension can call the OC user by dialing “99001” to “99009”.
3. If the dial pattern of the outbound route of MyPBX is “9.” and the OC user want to call PSTN number ”5503309”, the OC user should dial “95503309” to call out.
4. PSTN inbound calls can get into a DISA and then go to the OC users.
2. The Configuration of OCS
After the deployment of OCS server and OCS mediation server, follow the steps.
2.1 The Configuration of OCS Global Properties and Voice Properties
Step 1 Right click Forest –> Properties –> Global Properties
General—Specify the SIP Domains supported in your organization.
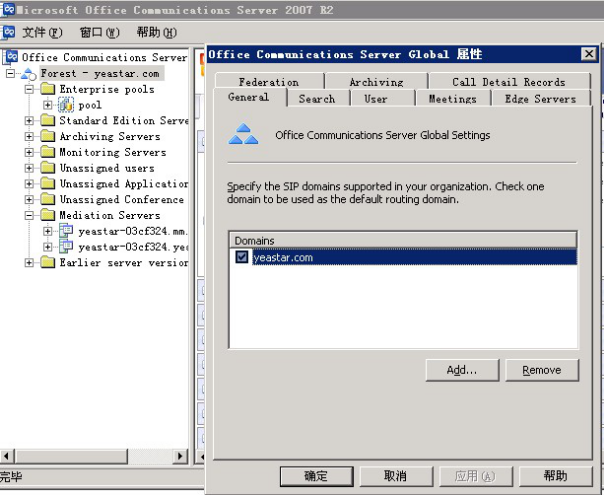
Figure 1
Step 2 Meetings
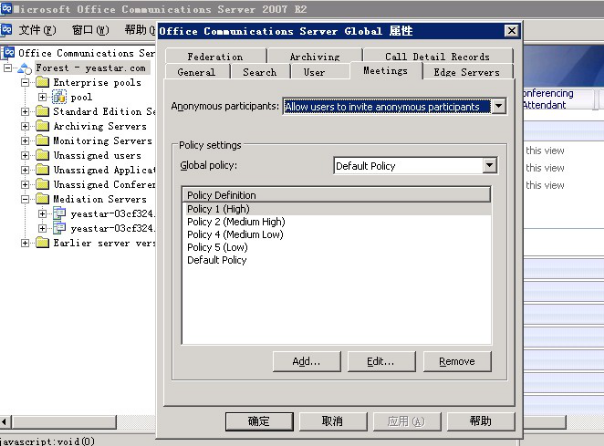
Figure 2
Step 3 Left click Forest-> Properties-> Voice Properties
Location Profiles->Add…/Edit…
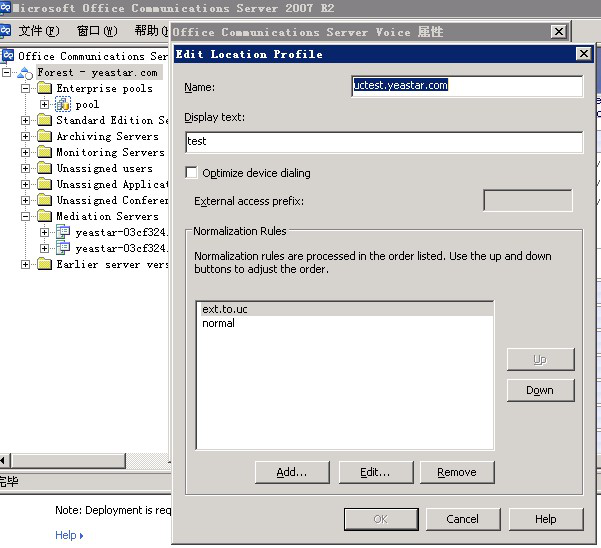
Figure 3
Edit Phone Number Normalization Rule
Detail on:
http://office.microsoft.com/en-us/help/phone-number-normalization-rule-regular-expressions-HP010290159.aspx
The setting below means when you dial a number starts with “99”, the system will dial a number starts with “+99” (if you want to call the OC user’s virtual number, “+” is necessary).
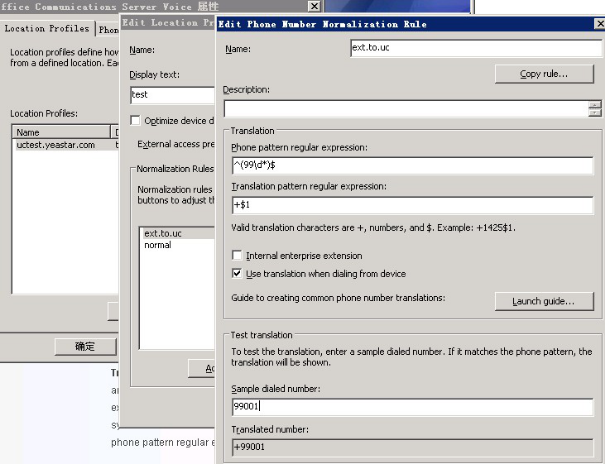
Figure 4
The setting below means when dialing a normal number, it doesn’t change the number itself.
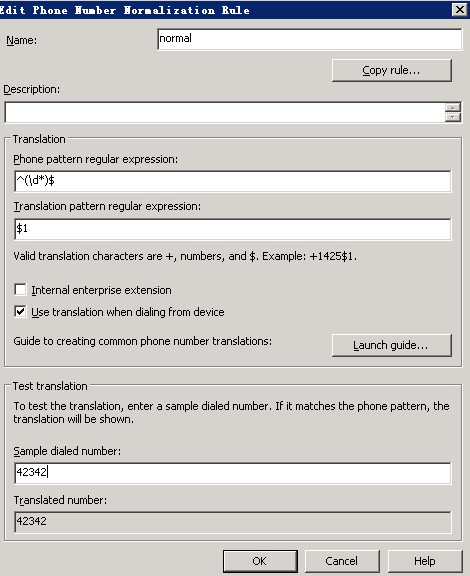
Figure 5
Step 4 Policy -> Edit -> Configure
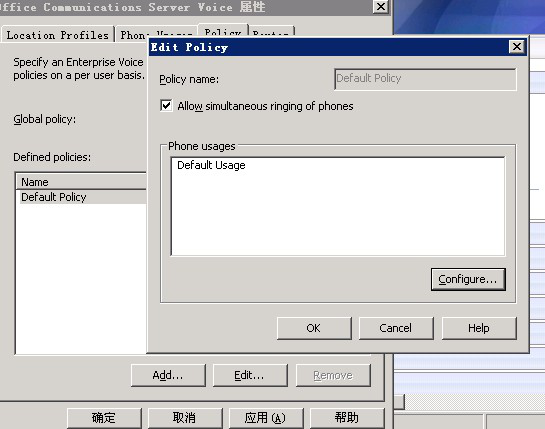
Figure 6
Configure
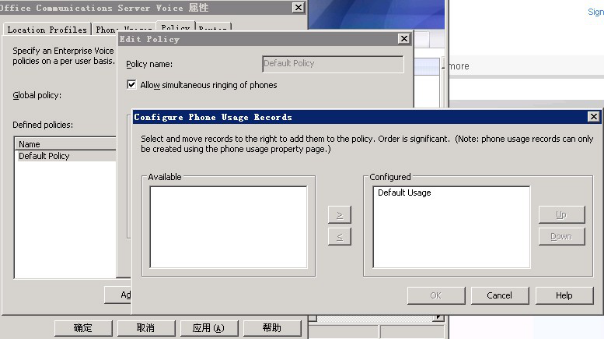
Figure 7
Step 5 Routes -> Add/Edit
The calls will use this route according to the Target Regular Expression.
In this case, if users want to connect to MyPBX (call the extensions or use the outbound routes), the calls will use the route. Choose the OCS Mediation Server as the Gateway. This setting means if the number starts with “60” (This setting is for you to call a MyPBX extension. MyPBX Extension numbers start with “60”.), the call will use this route.
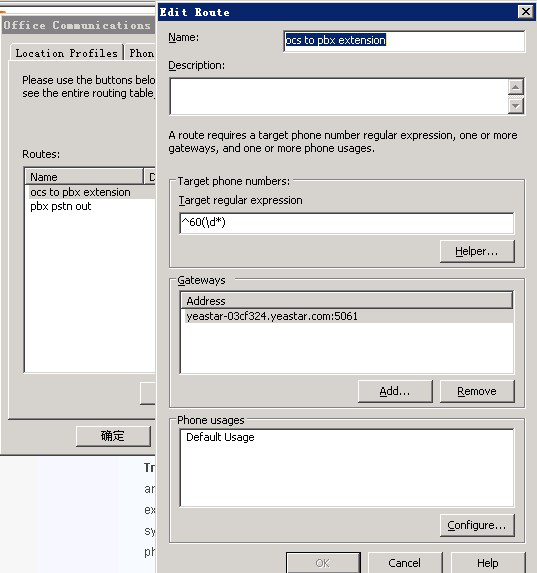
Figure 8
The setting below means when the number you dial starts with “9” (This setting is for you to use the outbound route of MyPBX. The dial pattern of MyPBX outbound route is “9.”.), the call will use this route.
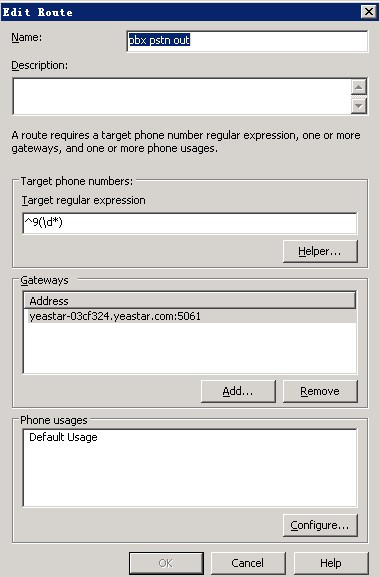
Figure 9
2.2 The Configuration of OCS Front End Properties
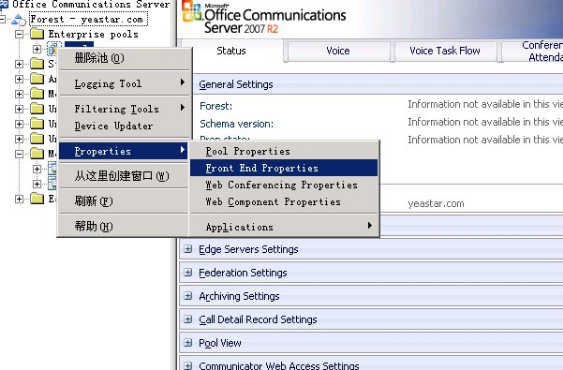
Figure 10
Step 1 Routing ->Add/Add (Next Hop FQDN should be the OCS Mediation Server, this setting will connect the OCS server with OCS mediation server.)
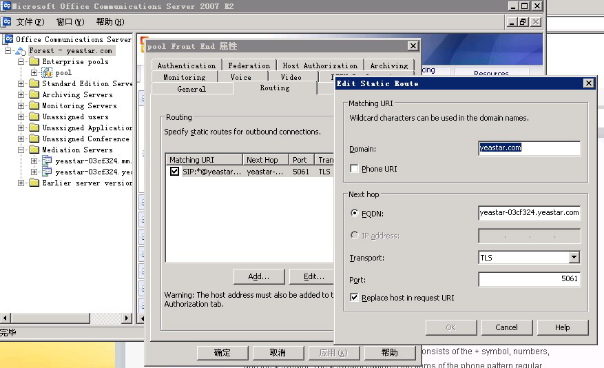
Figure 11
Step 2 Voice
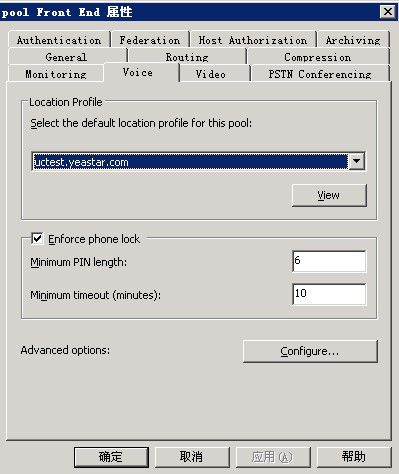
Figure 12
2.3 The Configuration of OCS Mediation Server
Step 1 Right Click Mediation Server -> Properties
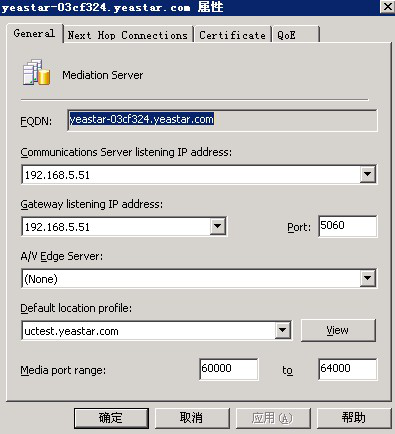
Figure 13
Step 2 Next Hop Connections
Office Communications Server next hop will be the OCS server. PSTN Gateway next hop will be MyPBX (192.168.5.101). (This setting will create 2 connections. One is between OCS Mediation server and OCS server, the other is between OCS Mediation server and MyPBX)
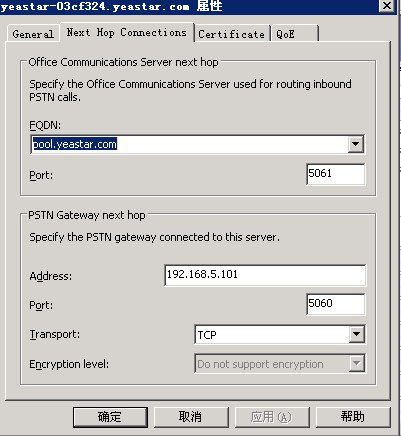
Figure 14
2.4 The Configuration of OCS User
Right click one of the Users –> Telephony Setting
“tel:+99001” means the virtual number of this OC user is “+99001”.
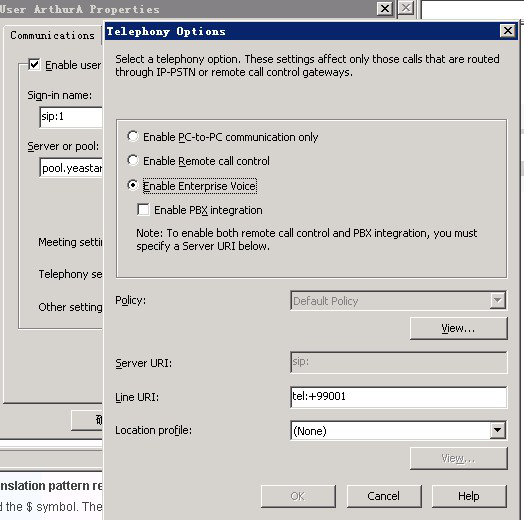
Figure 15
3. The Configuration of MyPBX
Step 1 Create the Connection between OCS and MyPBX
Basic -> Trunk -> New Service Provider
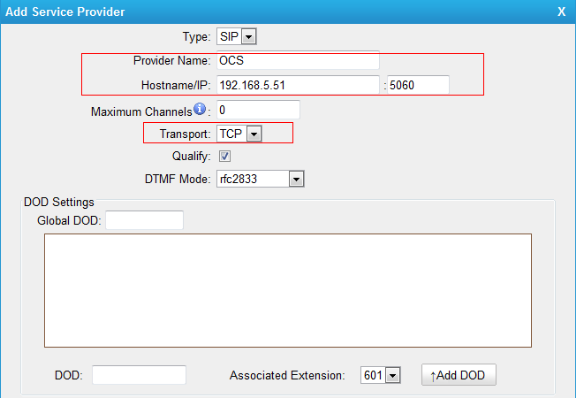
Figure 16
Step 2 Configure OC Users to Call MyPBX Extensions
Inbound Route-> New Inbound Route
This setting means when UC users dial 6001 to 6050, they will call the MyPBX’s Extensions 6001 to 6050.
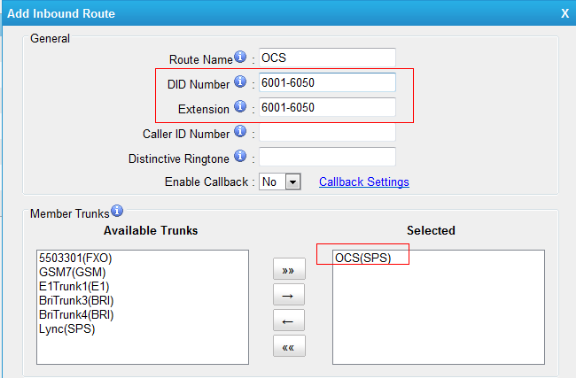
Figure 17
Detail test in section 4.1.
Step 3 Configure OC Users to Use the Outbound of MyPBX
Inbound Route -> New Inbound Route
This setting means the calls from OCS will go directly to the outbound route. You can have a try on other settings such as IVR or DISA.
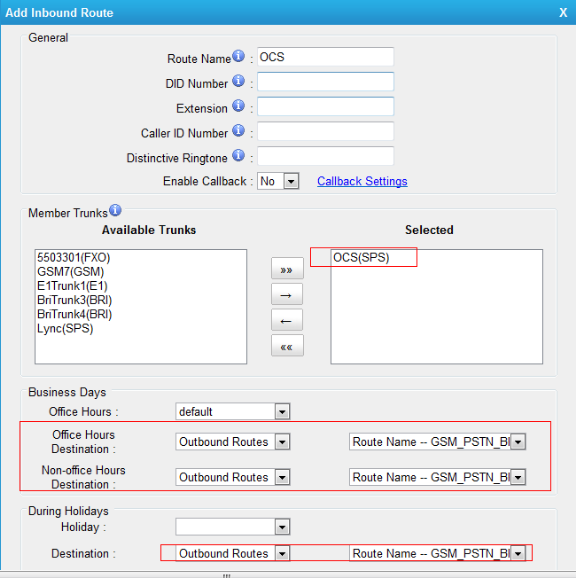
Figure 18
Detail test in section 4.1.
Step 4 Configure MyPBX Extensions to Call OC User
Outbound Route -> New Outbound Route
This Setting means when the extensions dial the number that starts with “99”; this call will go to the OCS Server.
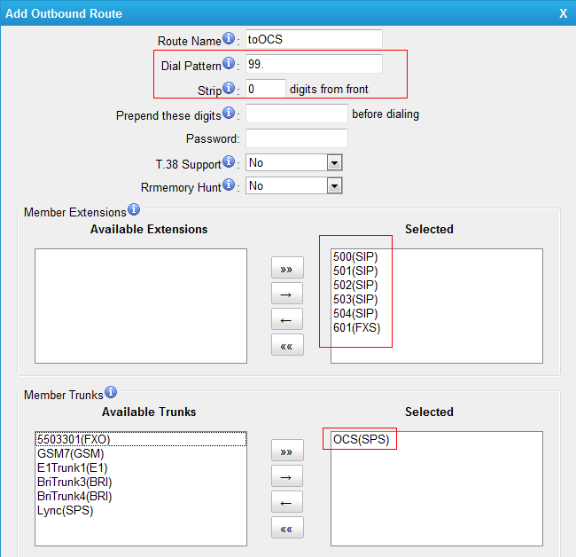
Figure 19
Detail test in section 4.2.
4. Test
4.1 OC Users Call MyPBX Extensions and Use Outbound Routes
In this case, OC user dials 6001 to call ext.6001 of MyPBX.
To use the outbound routes of MyPBX, the OC user should follows the setting of MyPBX. If the dial pattern of the outbound route is“9”, the OC user should dial “9” before the number. E.g. 89xxxxxx (xxxxxx is the number the OC user wants to call).
4.2 MyPBX Extensions Call OC User
In this case, all the virtual numbers of OC users start with “99”. MyPBX extensions dial a number starts with “99” will connect to OCS. If you dial “99001”, you will call the OC user whose virtual number is “+99001”.
4.3 Inbound Call to OC User
Create a DISA, Inbound calls will go to the DISA and then the caller can dial the virtual number of OC user directly.
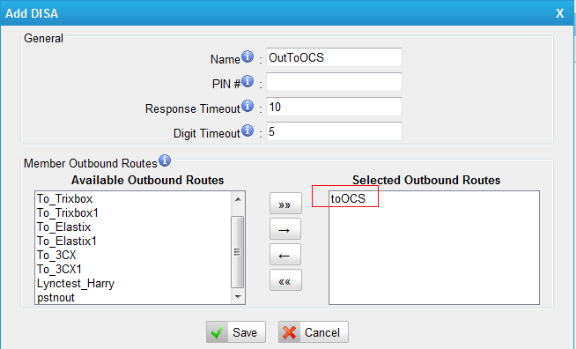
Figure 20
0 Comments