How to get Snom D735 provisioned by Cloud PBX with and without RPS

Applicability

  • Model: Cloud PBX
  • Firmware version: any


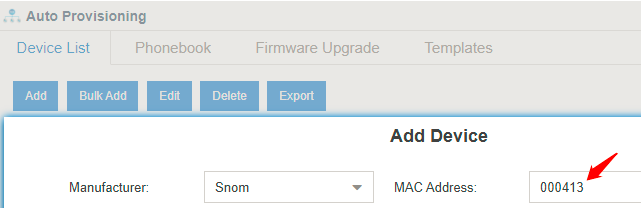
1. First of all, add a device on Cloud PBX and fill the MAC of the Snom D735 correctly.

mceclip0.png


2. With RPS

1). Save the auto P settings on the Cloud PBX and click reboot the phone. 
Cloud PBX will send RPS request to SNOM RPS server for registering the phone's MAC.

mceclip1.png

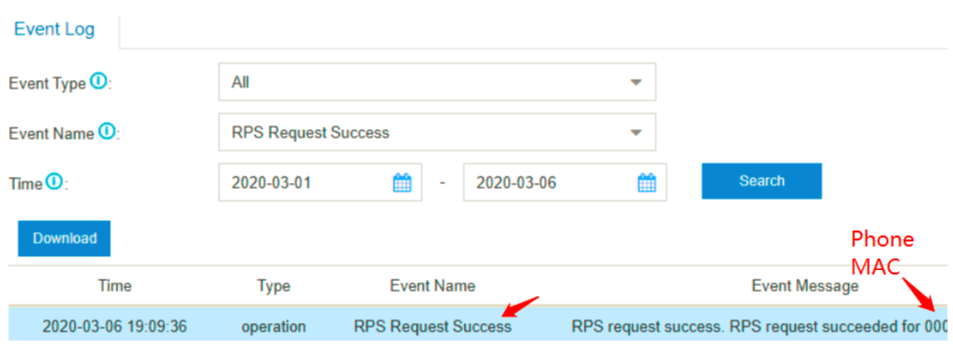
You could check the MAC registration on the SNOM RPS server if you have got an RPS account from SNOM.

mceclip3.png

2). Reset the Snom D735.
https://service.snom.com/display/wiki/Reset+a+phone+to+factory+defaults+or+reset+all+settings

mceclip4.png

3). Configure an IP(Phone Settings>Network>IP Settings>IPV4>DHCP or static) which has the ability to access the public network for the phone after the reset.

4). Snom D735 will send a request to Snom RPS to get the Settings Server's URL.

Please note that you need to input the HTTP username and password after the reboot of the phone.

mceclip5.png

And then the phone will be provisioned automatically.

mceclip6.png

You could also log on the Snom D735 and see that the settings server is related to our Cloud PBX.
Physical operation on the phone: Settings>Maintenance>Security>Enable Administrator Mode(password 0000).
mceclip7.png

3. Without RPS

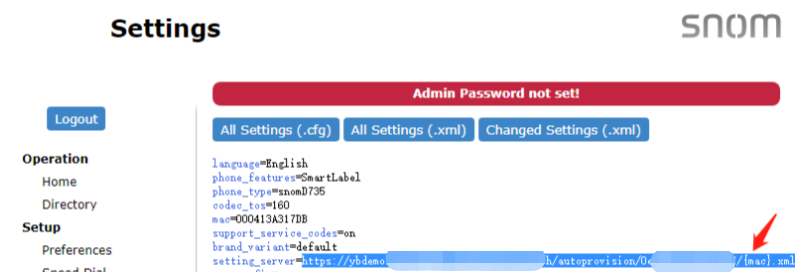
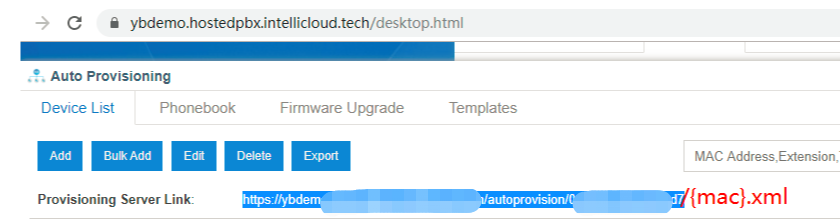
1). Copy the provisioning server link with /{mac}.xml suffix added.

mceclip8.png

2). Reset the Snom D735.
https://service.snom.com/display/wiki/Reset+a+phone+to+factory+defaults+or+reset+all+settings

mceclip4.png

3). Configure an IP(Phone Settings>Network>IP Settings>IPV4>DHCP or static) which has the ability to access the public network for the phone after the reset.

4). Log on its webGUI and go to Advanced Settings>Update>Configue Settings URL manually.
mceclip9.png

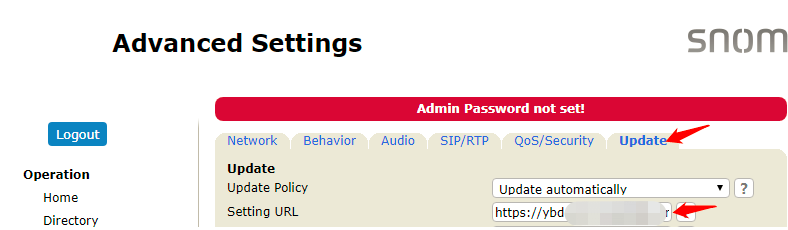
5).  Reboot the phone and it should work.


Have more questions? Submit a request

0 Comments

Please sign in to leave a comment.