
This guide introduces how to register and set up X-Lite softphone to Yeastar S-Series IPPBX. The setup information below is based on X-Lite 4.9.6.
X-Lite Softphone Configuration
Before configuration, you can download X-Lite for Windows PC or Mac here.
Follow the steps below to configure X-Lite to Yeastar S-Series IPPBX.
STEP 1. Launch Eyebeam softphone.
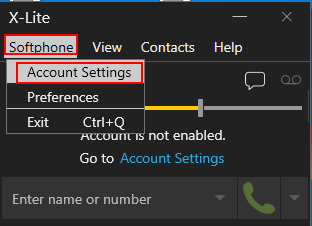
STEP 2. Click “Softphone > Account Settings”, configure the SIP account.
STEP 3. Enter the account information.
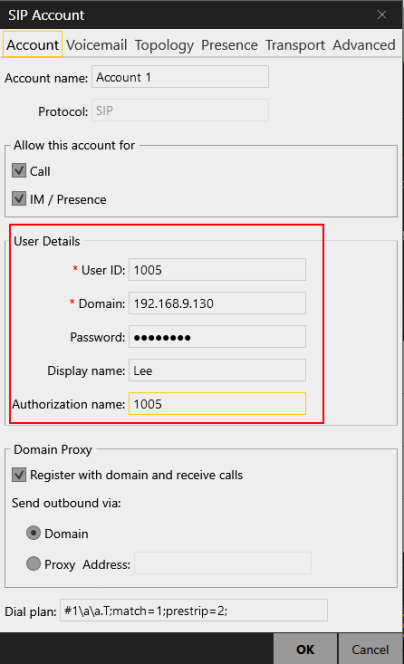
- User ID: enter the extension number.
- Domain: enter the IP address of S-Series
- Password: enter the extension password.
- Display Name: specify a name that will display on the phone.
- Authorized Name: enter the extension’s registration name.
- Enable “Register with domain and receive inbound calls”, and select “Domain”.
STEP 4. Click “OK”, X-Lite will attempt to register to S-Series IPPBX. If registered successfully, you can see the figure shows as below.
0 Comments