eyeBeam Information
The eyeBeam software may be purchased here(http://www.counterpath.com/eyebeam/). The setup information below is based on eyeBeam 1.5.
Configuring eyeBeam
Follow the steps below to configure eyeBeam to Yeastar S-Series IPPBX.
STEP 1. Launch Eyebeam softphone.
STEP 2. If it is the first time that you open eyeBeam, you will see the figure shows as below. Go to STEP 4. 
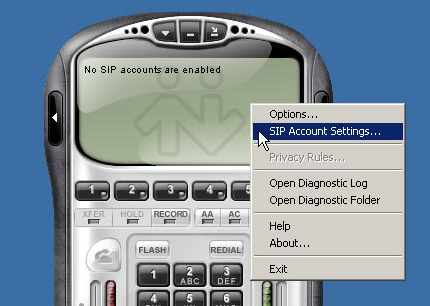
STEP 3. If this is not the first time you open the eyeBeam, right click on the softphone, select “SIP Account Settings”.
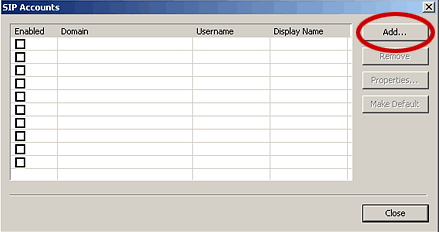
STEP 4. Click “Add...” to add a SIP account. 
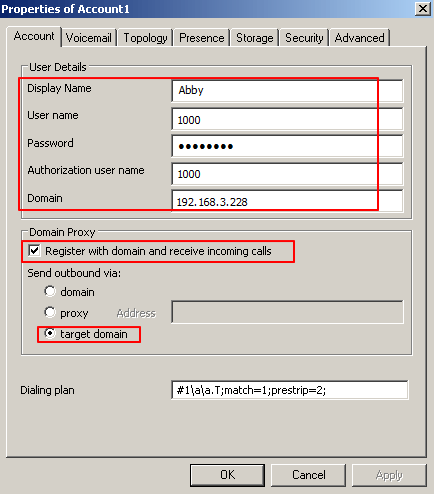
STEP 5. Enter the account information. 
- Display Name: enter your name in this field.
- User Name: enter the extension number.
- Password: enter the extension’s registration password.
- Authorization User Name: enter the extension’s registration name.
- Domain: enter Yeastar S-Series IPPBX’s IP address.
- Enable “Register with domain and receive incoming calls”.
STEP 6. Click “OK”, eyeBeam will attempt to register to S-Series IPPBX. If registered successfully, you can see the figure shows as below. 

2 Comments