
Overview
PBXDom, is leading provider of cloud based call monitoring and analytics service. By connecting to PBXDom, it can provide reports and various dashboards regarding phone activity in organizations. PBXDom helps companies to reduce their unnecessary telephone expenses, increase the security of the telephone network and prevent the toll fraud. It can also analyze and increase the productivity of staff in sales and service departments. For more information, please visit https://www.pbxdom.com/
Configuring MyPBX
Log in MyPBX with the User name: admin and goto AMI Settings.
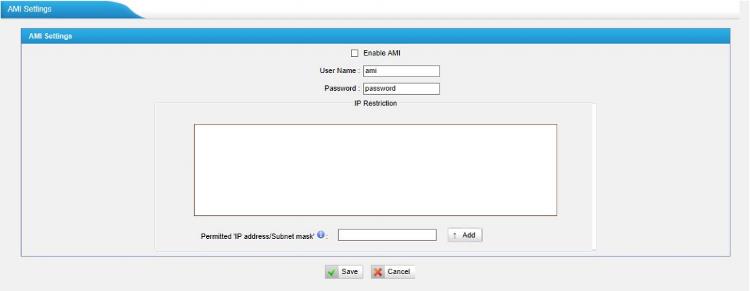
- Check Enable AMI
- Enter Username = pbxdom
- Enter password = pbxdom
- Click on save button.
- Enter IP address of the PC collector installed on it, in Permitted IP Address/Subnet Mask for example, if you installed collector software on PC with IP address 192.168.5.10 you must enter 192.168.5.10/255.255.255.0 and click on Add button.
- Click on save button again.
- On top of the page click on apply changes.
How to Install the PBXDom Collector Software
- Download collector file from website or setup page. ( for download go to https://www.pbxdom.com/download
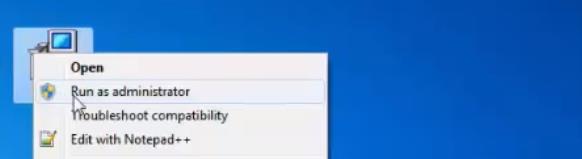
- When download is completed, right click on setup.exe and select run as administrator to run the setup file.
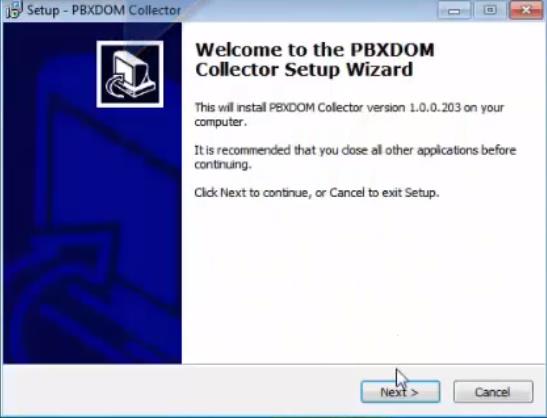
- Click on next button.
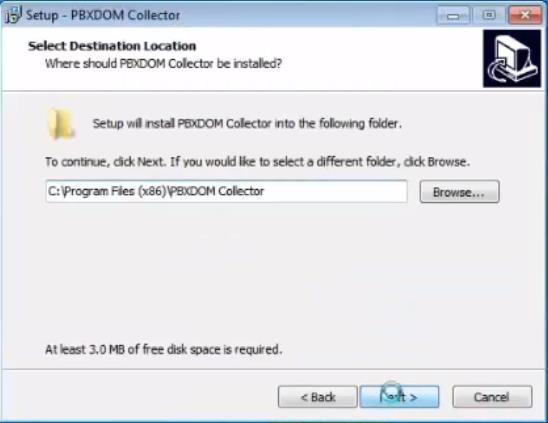
- If you need to change the installation directory, select the target directory and click next.
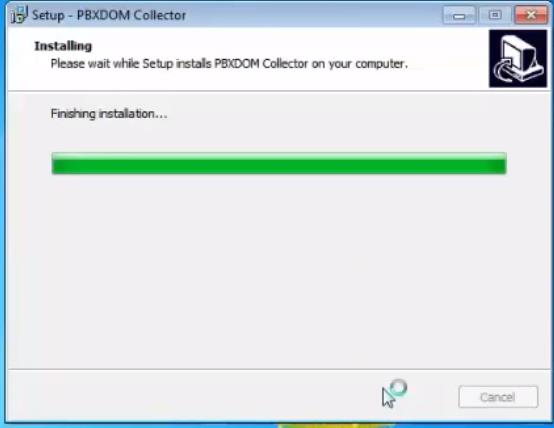
- Wait until setup has been completed.
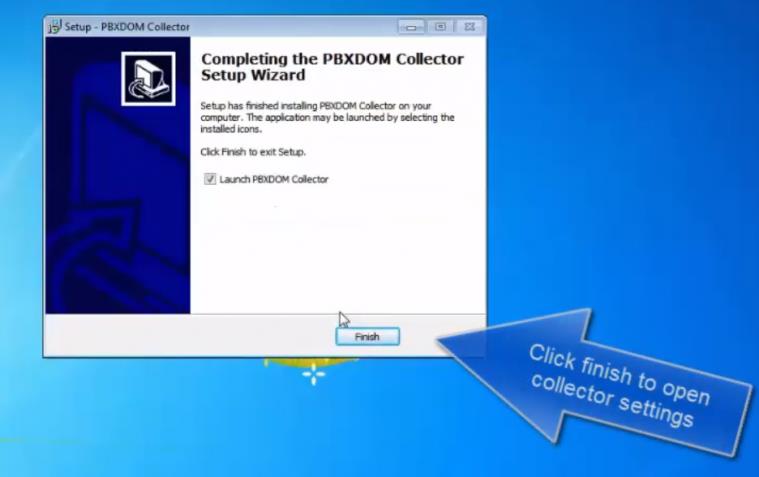
- Click on finish button to open collector settings program.
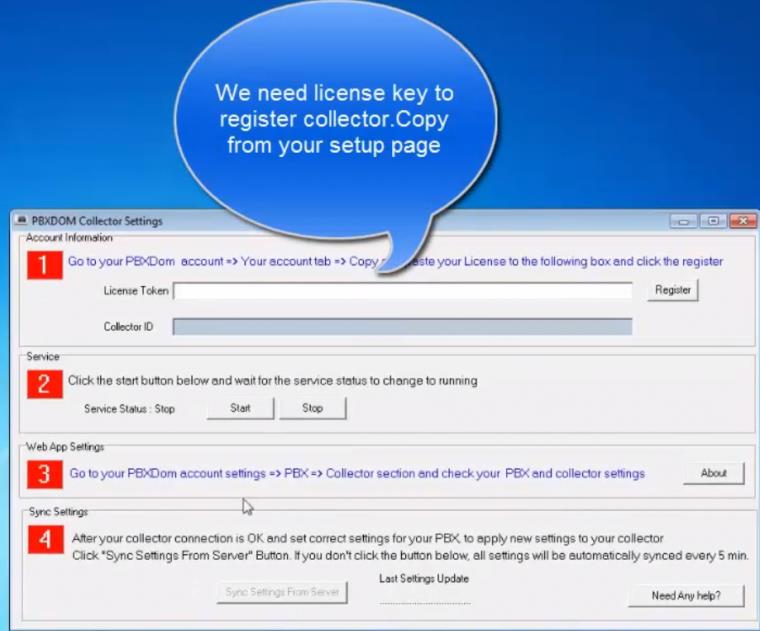
- You need the enter your license key in the license token box and click on the register button. To get your license key, you must go to your PBXDom account or setup page.
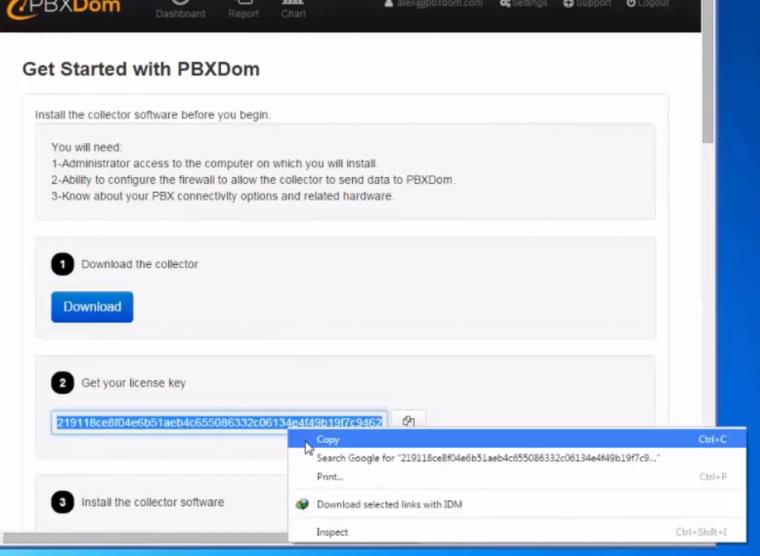
- Copy your license token from setup page.
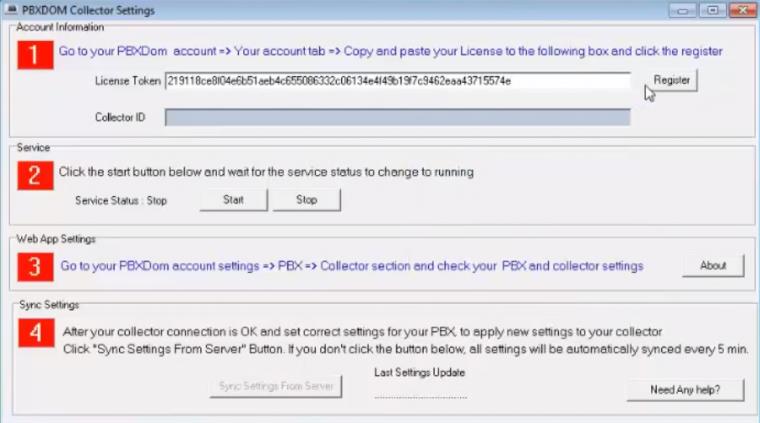
- Paste your license key and click on the register button.
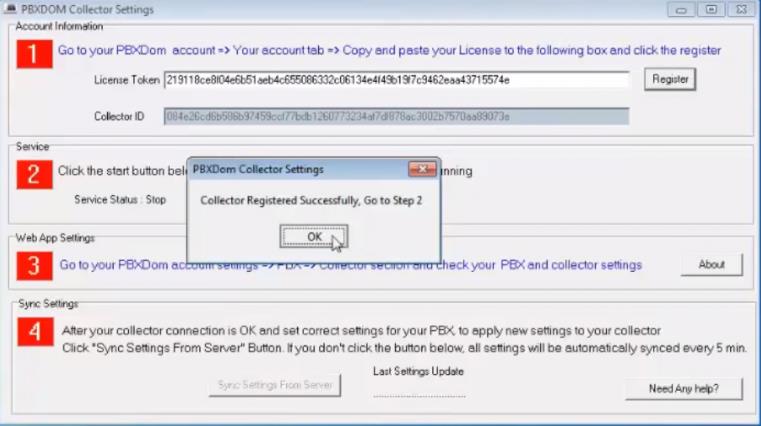
- If your registration key is correct, you must see collector registered successful window. Click ok to close;
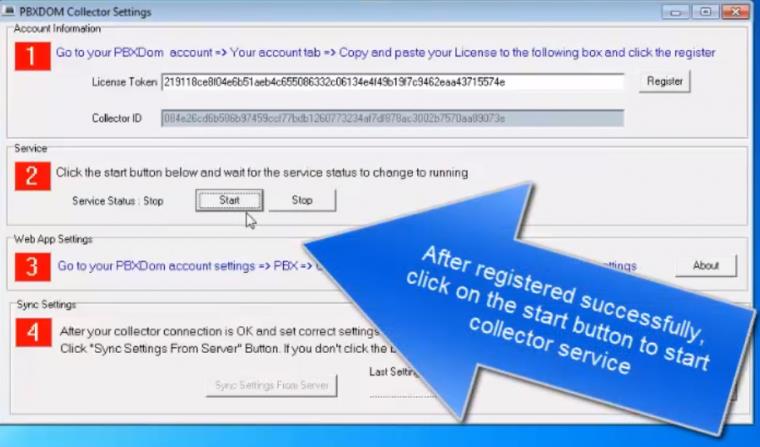
- Once registration successfully, click on the start button in section two to start collector service and wait until service status changed to started.
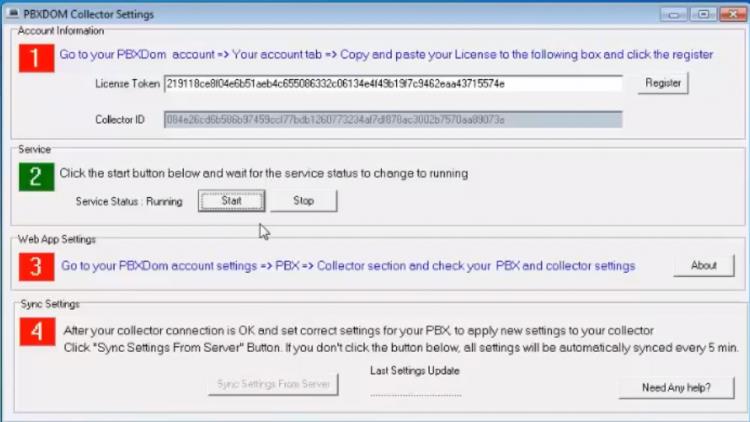
- When number two became green, and service status is shown Running. Our work on collector side has finished, and you can close collector settings program. To apply PBX configuration, we must go to the website. Before applying PBX configuration, you must make sure your collector registered successfully in next step.
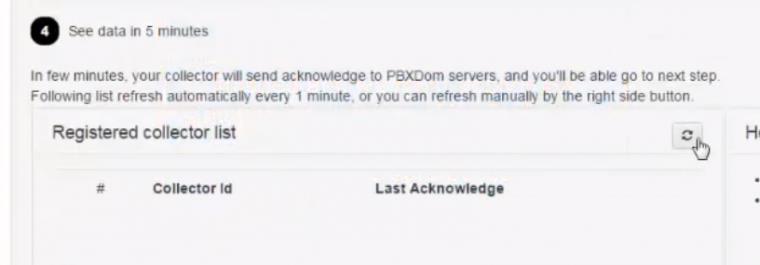
- In setup page, please click on the refresh button to see your registered collector list. If your collector registered successfully, you must see your registered collector in this list.
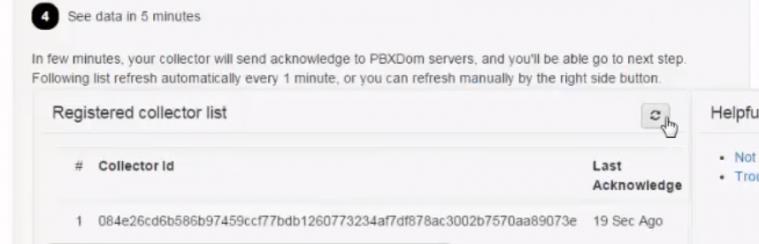
- If you see your registered collector in the list, your collector side tasks are finished, and you must apply correct settings to connect your MyPBX to PBXDom.
Add Your PBX to PBXDom
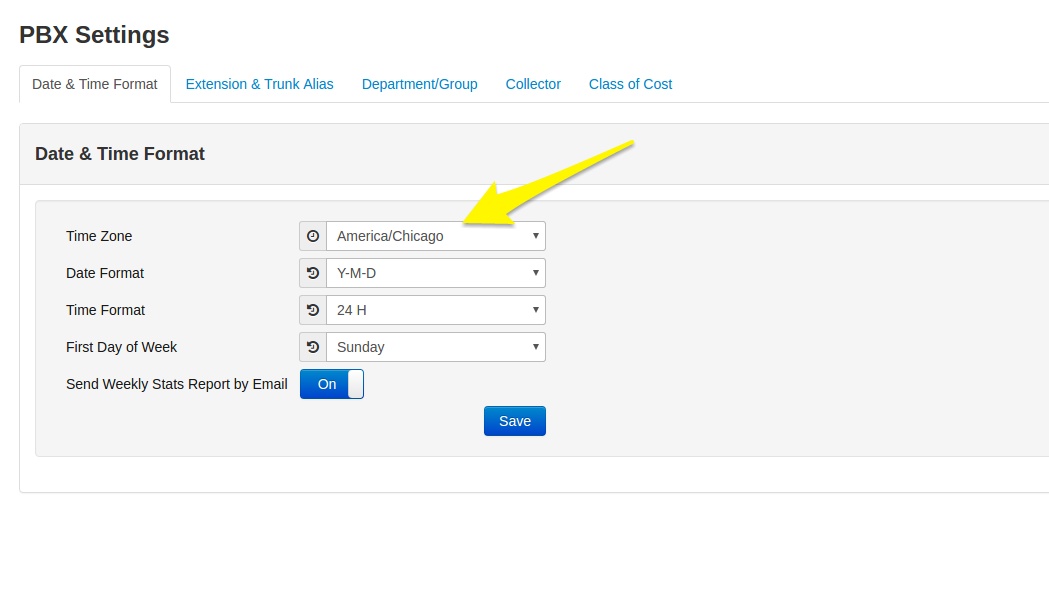
- Click settings->PBX and open Date & Time Format tab and make sure your time zone is correct. All other settings must same as following image:
- Click settings->PBX and open collector tab and click + button to add your MyPBX.

- Enter required information and select Yeastar vendor and your PBX model.
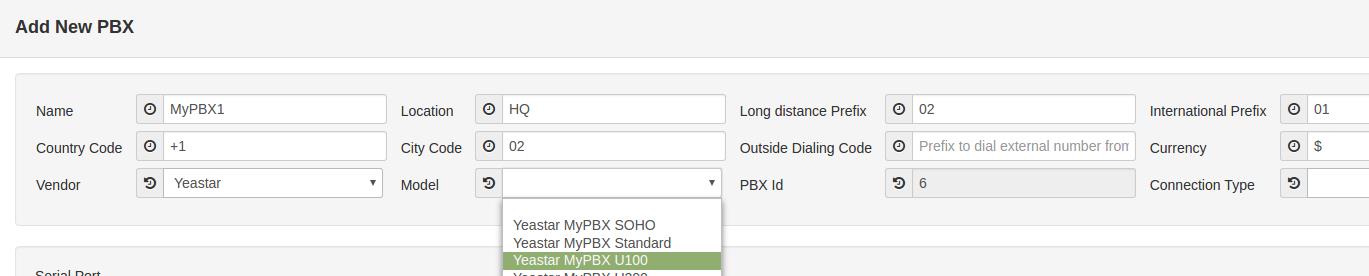
- Select “TCP/IP client” from connection type.
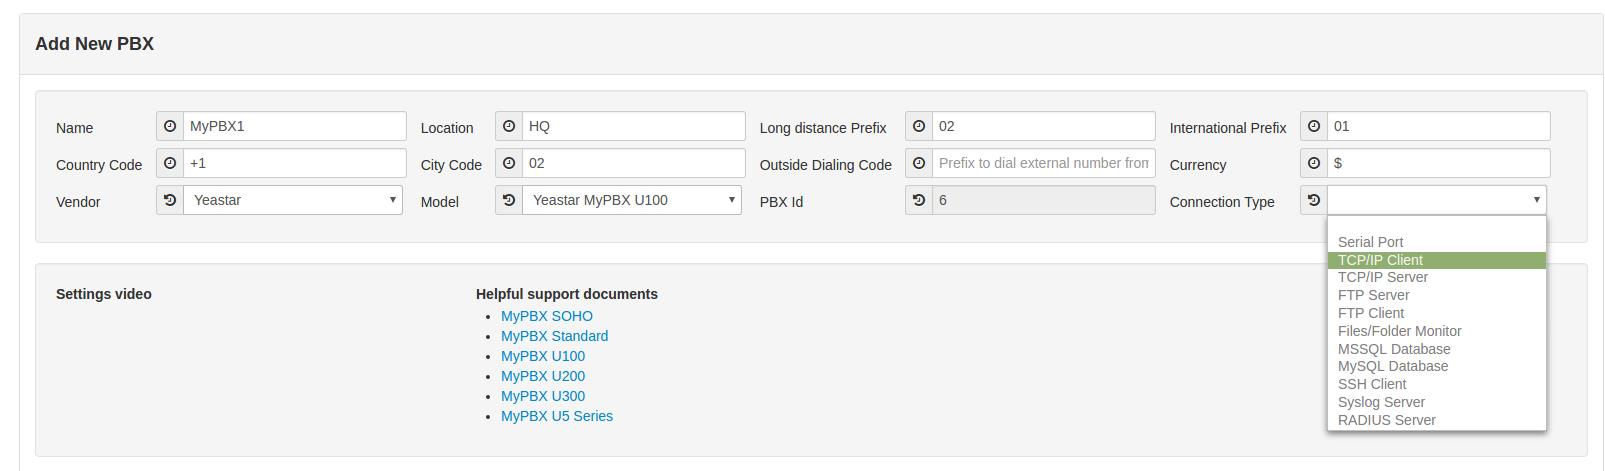
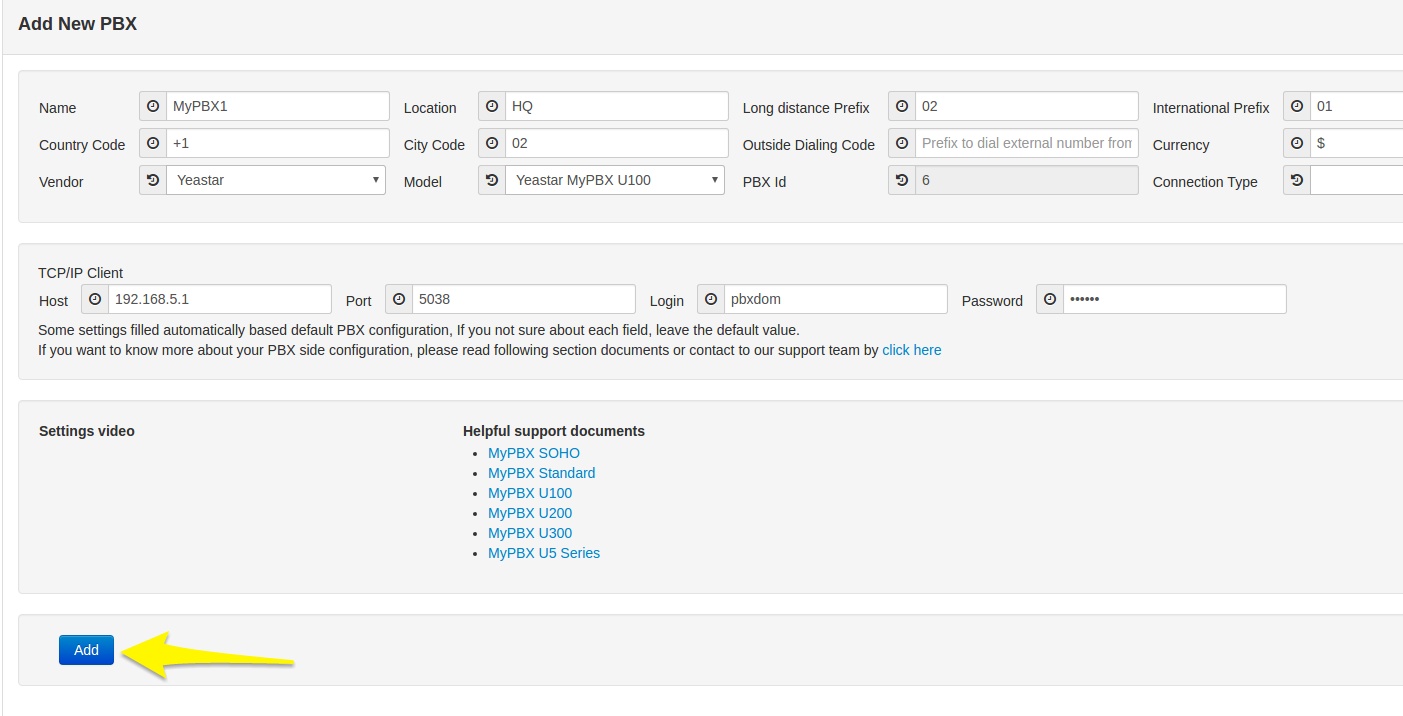
- Enter your MyPBX IP address and login & password and click Add.
You should see your call information in your dashboard after 5 minutes if all your settings are correct.
This guide refers to the following links:
https://www.pbxdom.com/yeastar-mypbx-soho-call-accounting-reporting-service
https://www.pbxdom.com/yeastar-mypbx-standard-reporting-analytics-service
https://www.pbxdom.com/yeastart-mypbx-u100-call-accounting-reporting-service
https://www.pbxdom.com/yeastar-mypbx-u200-call-reporting-service
https://www.pbxdom.com/yeastar-mypbx-u300-call-accounting-software
https://www.pbxdom.com/yeastar-mypbx-u5-series-call-accounting-software
https://www.pbxdom.com/how-to-install-the-collector-software
0 Comments