
There are two modes can be used to achieve Phone Provisioning feature.
1. PnP mode
Step 1. Log in MyPBX Web GUI.
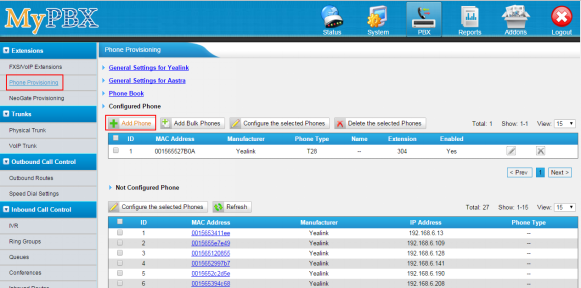
Step 2. Go to Phone Provisioning page.

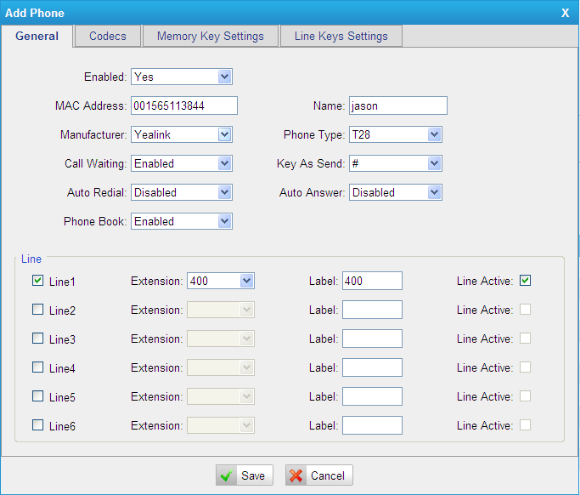
Step 3. Click the MAC of the IP phone you would like to configure. Set up the Name, Phone type, Line settings and other settings.
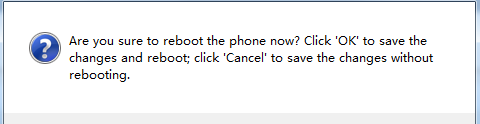
Step 4. Save the settings and reboot the IP phone. After you save the changes, the system will prompt you to save the changes and reboot or to save changes without rebooting. Click OK to reboot the IP phone and provisioning the phone.
Step5. Done.
2. DHCP mode
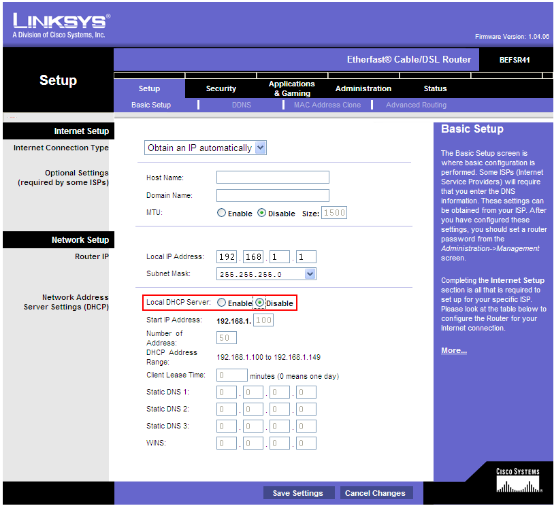
Step 1. Disable DHCP Server on your local network.
E.g. Disable DHCP Server on Linksys Router.
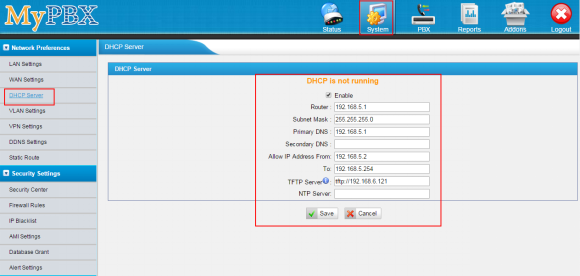
Step 2. Enable DHCP Server on MyPBX.
Log in MyPBX Web interface, System--Network Preference--DHCP Server--Enable DHCP Server.
Step 3. Configure phones on MyPBX Phone Provisioning page.
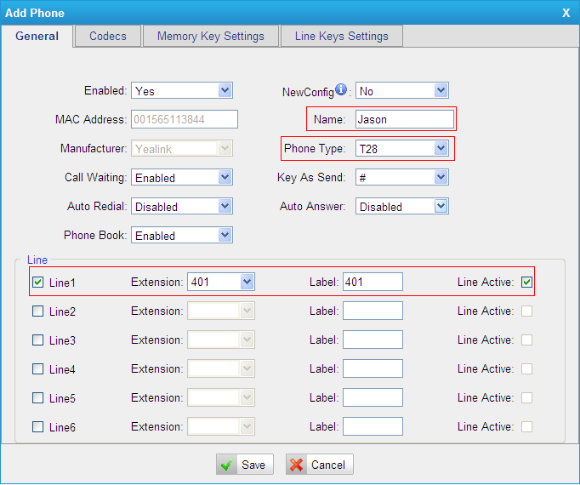
1. Log in MyPBX Web interface, PBX--Extensions--Phone Provisioning--Add Phone.
2. Fill in the phone detail message on the pop-up windows.
Input IP Phone’s MAC address, and configure Name, Call Waiting, Line, Extension, Label, Line Active for the phone. When done, click “Save” and “Apply Changes”.
Step 4. Save the settings and reboot the IP phone.
After you save the changes, system will prompt you to save the changes and reboot or to save changes without rebooting. Click 'OK 'to reboot the IP phone.

Remark: The factory default setting of DHCP for IP Phone is enabled, so you can skip this step.
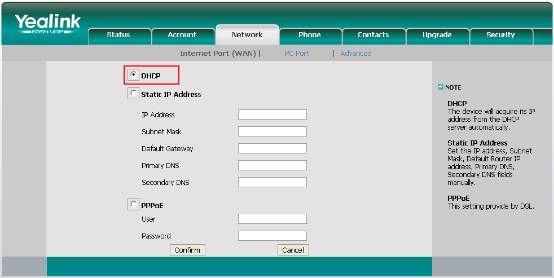
If the DHCP is disabled, please follow below step to enable it (e.g. Yealink IP Phone).
1. Log in IP phone’s Web page.
2. Enable DHCP.
Step5. Finish.
0 Comments