- Introduction
- NAT and Port Forwarding
- Intercommunication between 3CX and Yeastar S100
- Making Outgoing Calls from 3CX through Yeastar S100’s Trunks
- Receiving Yeastar S100’s Incoming Call at 3CX
Introduction
This article provides step-by-step configuration instructions of how to connect 3CX phone system and Yeastar S-Series VoIP PBX. After connecting 3CX and Yeastar S-Series IPPBX, you can achieve:
- Making internal calls between 3CX and Yeastar S-Series IPPBX
- Making outgoing calls from 3CX through Yeastar S-Series IPPBX’s trunks
- Receiving Yeastar S-Series IPPBX’s incoming calls at 3CX
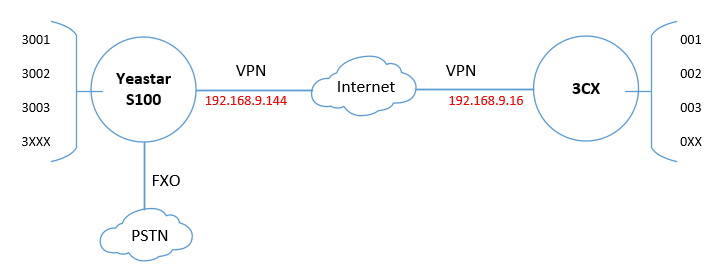
In this article, we tested 3CX v15 and Yeastar S100 v30.4.0.15, the two PBX are installed in different places and are connected via VPN network.
- Yeastar S100 Extensions: 3XXX
- 3CX Extensions: 0XX
NAT and Port Forwarding
In this article, we connect two PBXs via VPN network in a secure way. If you connect the two remote PBXs via public IP or domain, and the PBXs are behind routers, you need to forward ports on both the two routers.
Check the default ports below.
Port |
3CX |
Yeastar S-Series VoIP PBX |
|
SIP |
UDP 5060 |
UDP 5060 |
|
RTP |
UDP 9000-9500 |
UDP 10000-12000 |
Note: after successfully forwarding the ports, you need to use the public IP/ domain and forwarded ports to set up SIP trunks.
Intercommunication between 3CX and Yeastar S100
Step 1 Create SIP Trunk on 3CX
- Log in 3CX Web interface, click SIP Trunks > Add SIP Trunk, set the trunk type and click OK.
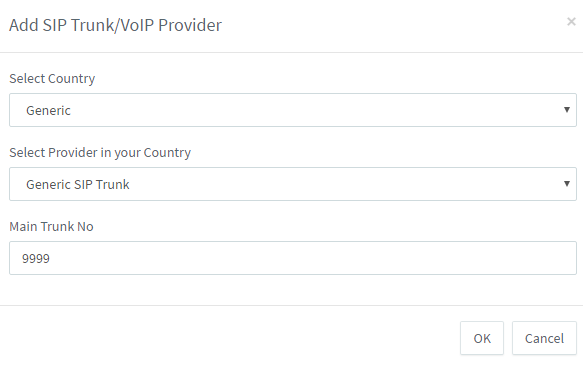
- Country: Generic
- Provider: Generic SIP Trunk
- Main Trunk No: main trunk number refers to DID number for the SIP trunk, here we set to “9999”.
- Enter name for the SIP trunk and enter Yeastar S100’s IP in the filed Registrar/Server/Gateway Hostname or IP, leave other settings as default.
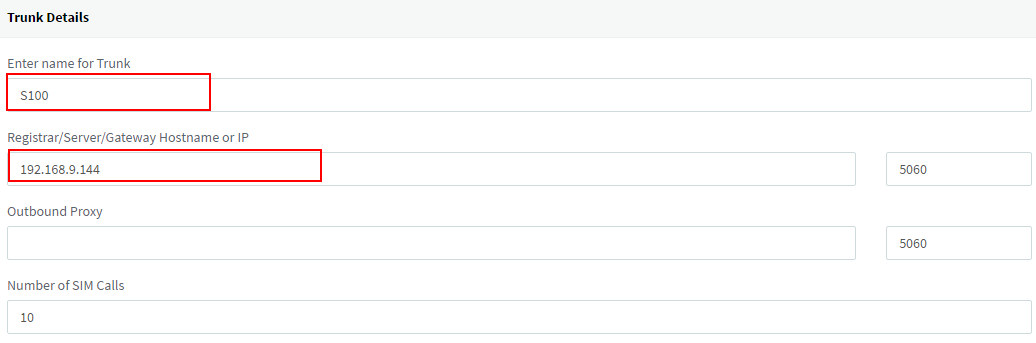
- Click OK and check the trunk status. If the status shows green, then the trunk is successfully connected to Yeastar S100.
Step 2 Create Outbound Rule on 3CX
- Click Outbound Rules > Add, create an outbound route.
- Set the Rule Name.
- Apply the rule to call Yeastar S100 extensions.
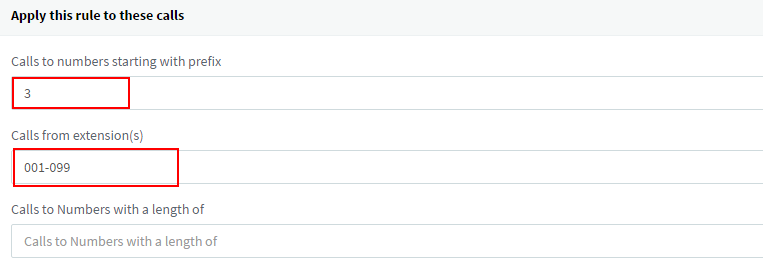
- Calls to number starting with prefix: enter the Yeastar S100 extension prefix, the extension format is 3XXX, so we set to “3”.
- Calls from extension(s): set which extensions are allowed to call through this outbound rule.
- Choose make outbound calls on which trunk, here we choose the SIP trunk which is connected to Yeastar S100.

- Click OK.
Step 3 Create Inbound Route on 3CX
- Click Inbound Rules > Add, create an inbound route to receive incoming calls from Yeastar S100.
- Set the rule Name and choose DID/DDI number as the SIP trunk’s Main trunk number.

- Select the inbound rule’s destination number, here we set to extension 001.

- Click OK.
Step 4 Create SIP Trunk on Yeastar S100
- Log in Yeastar S100 web interface, navigate to Settings > PBX > Trunks, click Add to add a new trunk.
- Configure the VoIP trunk as the following figure shows.
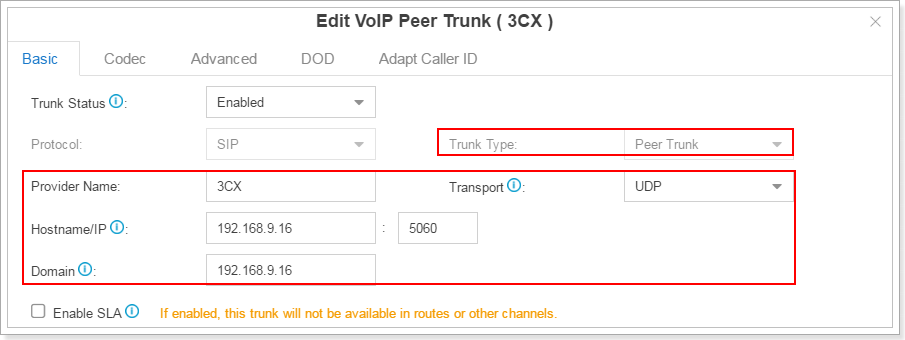
- Trunk Status: Enabled
- Trunk Type: Peer Trunk
- Provider Name: give the trunk a name.
- Hostname/IP: enter 3CX’s IP address.
- Domain: enter 3CX’s IP address.
- Click Save and Apply.
- Go to PBX Monitor, check the trunk status. If the status shows , then the S100 is successfully connected to 3CX.
Step 5 Create Outbound Route on Yeastar S100
- Navigate to Settings > PBX > Call Control > Outbound Route, click Add.
- Configure the outbound route as the following figure shows.
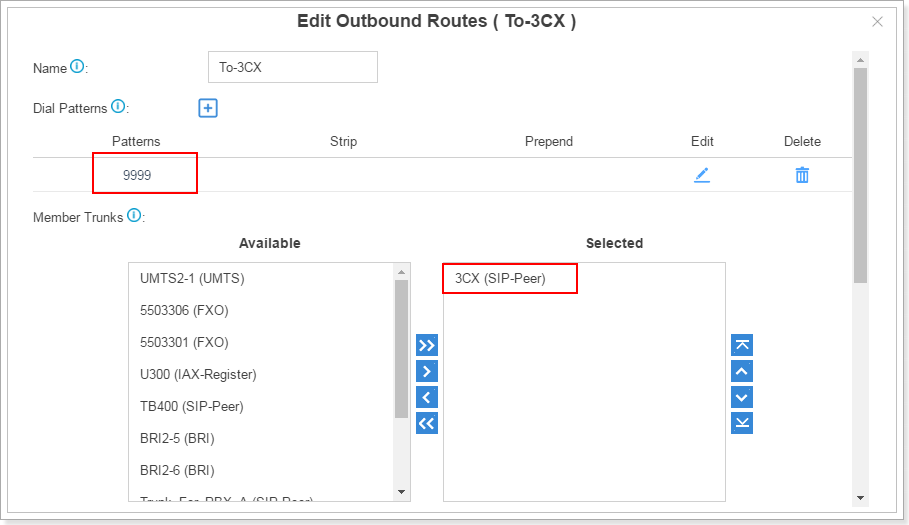
- Name: give the outbound route a name.
- Patterns: set to 9999, which is the same with the SIP trunk Main trunk number (DID number) on 3CX.
- Member Trunks: choose the SIP trunk “3CX”.
- Member Extensions: select extensions.
Step 6 Test Internal Call Between 3CX and Yeastar S100
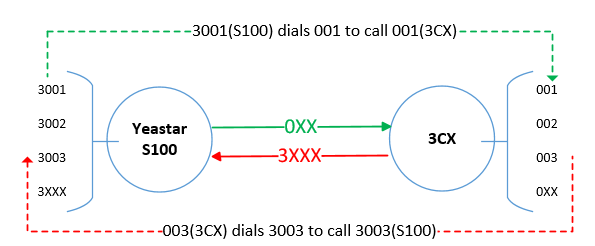
Now, you can test internal calls between Yeastar S100 and 3CX. For example:
- Use 3CX’s extension 001 dial 3001, the extension 3001 will ring.
- Use Yeastar S100’s extension 3001 dial 9999, the call will be routed to 3CX inbound rule’s destination.
Making Outgoing Calls from 3CX through Yeastar S100’s Trunks
In this section, we will show you how to make outgoing calls from 3CX through Yeastar S100’s trunks. Here we will use Yeastar S100’s FXO trunks to make outgoing calls.
- On Yeastar S100, go to PBX Monitor, check if the FXO trunks are ready to be used.
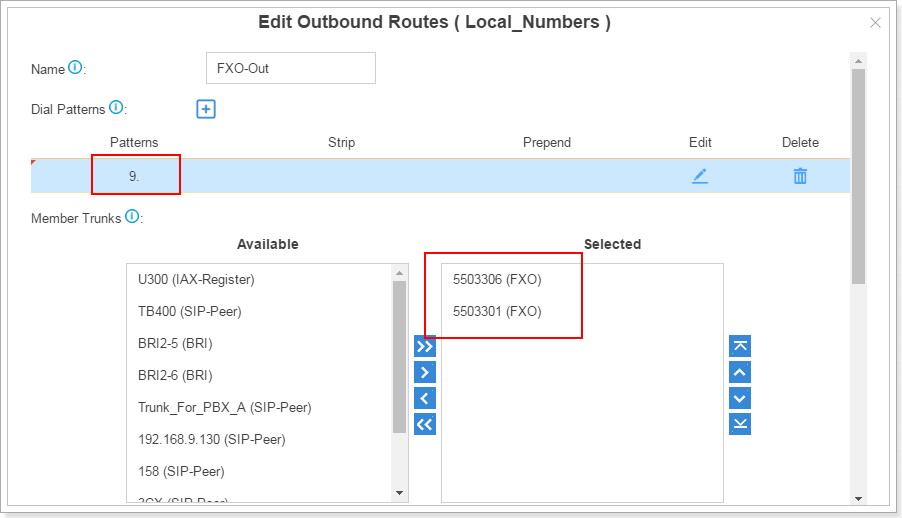
- Go to Settings > PBX > Call Control > Outbound Routes, create an outbound route for the FXO trunks. Here we set Dial Pattern as “9.”, and Strip “1” digit, which means that you need to dial prefix 9 before the destination number. For example, if you want to call number 123456, you need to dial 9123456.
- Go to Settings > PBX > Call Control > Inbound Routes, create an inbound route for 3CX SIP trunk.
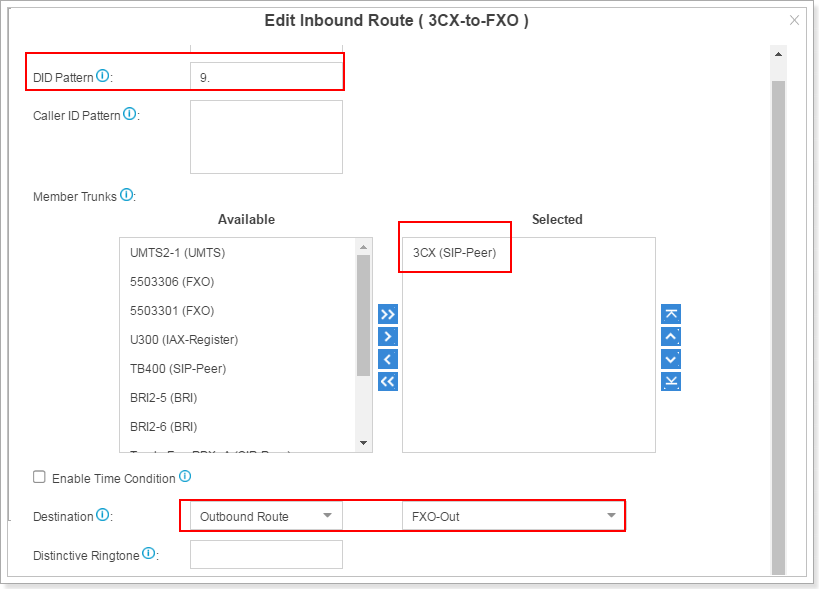
- Name: set a name for the inbound route.
- DID Pattern: set to the same dial pattern of the outbound route in Step2.
- Member Trunk: choose the 3CX SIP trunk.
- Destination: set to the outbound route in Step2.
- Go to 3CX Outbound Rule, double click the outbound rule “To-S100” to edit it, add call prefix 9.
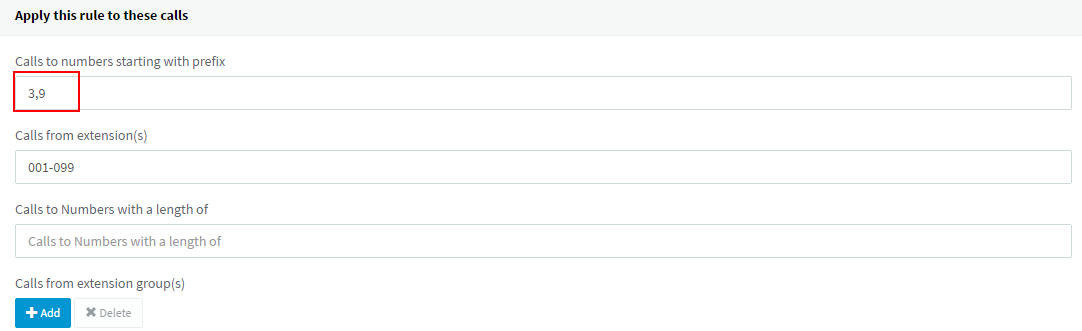
- Click OK.
- Test a call from 3CX extension. For example, call number 123456, you need dial 9123456.
Important:
Please adjust the outbound route order to ensure that you can make outbound calls successfully.

Receiving Yeastar S100’s Incoming Call at 3CX
In this section, we will introduce how to forward Yeastar S100’s incoming calls to 3CX. We will forward all incoming calls of FXO trunk to 3CX.
- On Yeastar S100 Web interface, go to Settings > PBX > Call Control > Outbound Route, create a new outbound route. This outbound route will be used to forward incoming calls to 3CX.

- Name: specify a name for the outbound route.
- Patterns: set to “X.”, which will allow all numbers through this outbound route.
- Member Trunks: choose the 3CX SIP trunk.
- Member Extensions: choose allowed extensions.
- Click Save and Apply.
- Go to Settings > PBX > Call Control > Outbound Route, create a new inbound route for the FXO trunks.
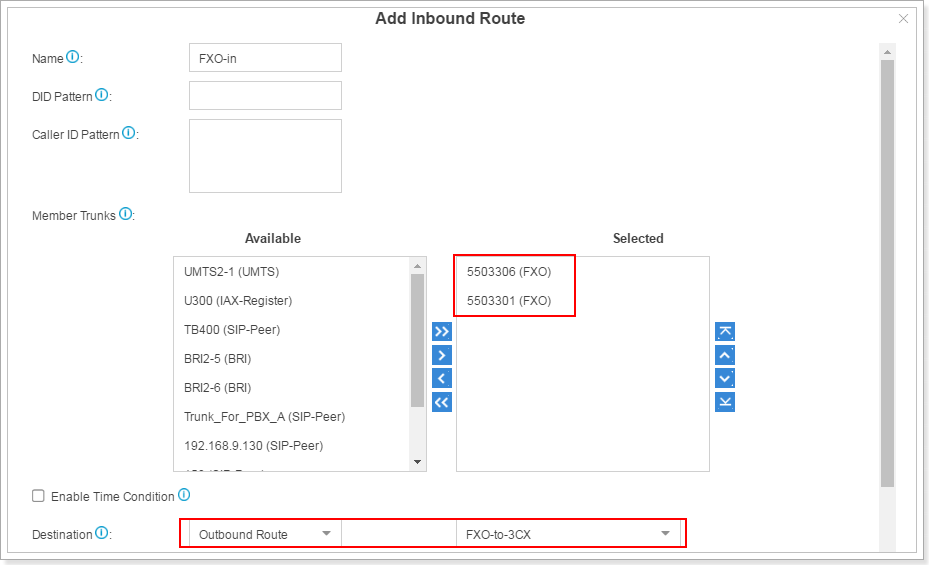
- Name: specify a name for the inbound route.
- Member Trunk: choose FXO trunks.
- Destination: choose the outbound route in Step1.
- Click Save and Apply.
- Edit the FXO trunks, set a DID Number for the trunks. The DID number is used to match the DID Number in 3CX’s inbound route.

- Click Save and Apply.
- Make a call in the Yeastar S100’s FXO trunks, the call will be forwarded to 3CX’s inbound route destination.


4 Comments