- Introduction
- Preparing TLS Certificates and Keys
- Configuring S100 with TLS
- Configuring Yealink T46G with TLS
Introduction
Yeastar S-Series VoIP PBX supports TLS protocol. You can set up Yeastar S-Series VoIP PBX with Secure SIP (TLS) to secure the SIP messaging.
This article provides instructions on how to configure TLS on Yeastar IPPBX and how to register a TLS extension. We tested with:
- Yeastar S100: firmware version 30.3.0.17; IP address: 192.168.4.142
- Yealink T46G: firmware version 28.80.0.95; IP address: 192.168.6.113
Preparing TLS Certificates and Keys
To make TLS certificates and keys, you need to use a tool that supports SSL and TLS protocols. We recommend you to use OpenSSL on Linux. The OpenSSL software is available for free online: http://www.openssl.org/source/.
Blow we give instructions on how to make certificates and keys on Windows. Download the tool here.
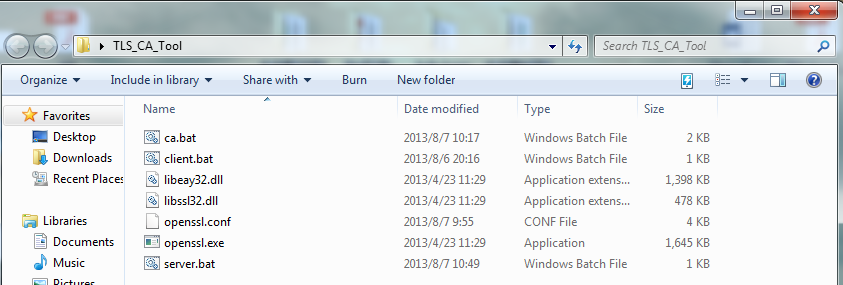
Extract the file TLS_CA_Tool.zip, and check the included files as the following figure shows.
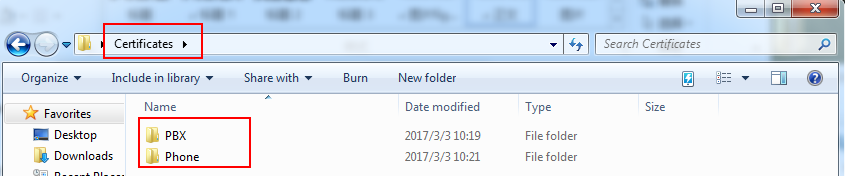
Before getting started, we will create a new folder to place certificates and keys for S100 IPPBX and IP phone.
Preparing Certificates and Keys for S100
Step 1. Prepare S100’s CA key: ca.crt.
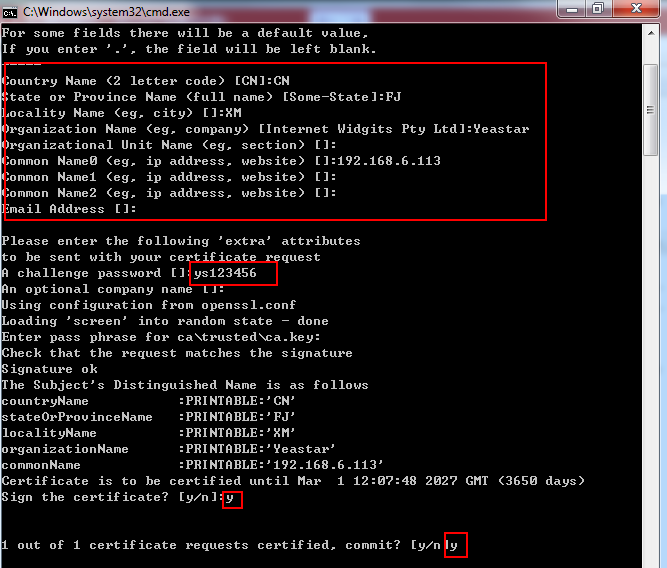
- Double click ca.bat file, set a password for the ca key.
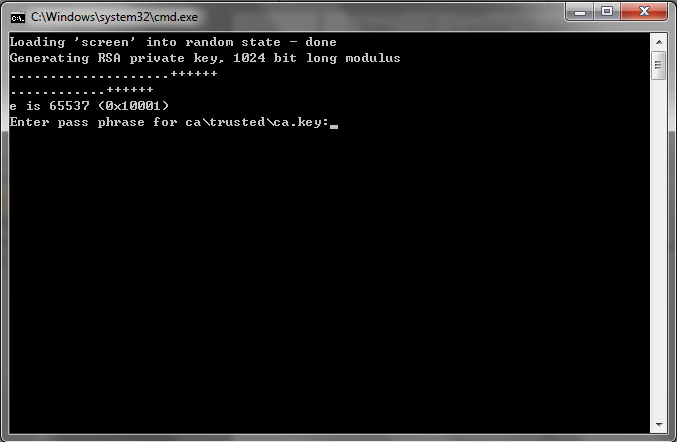
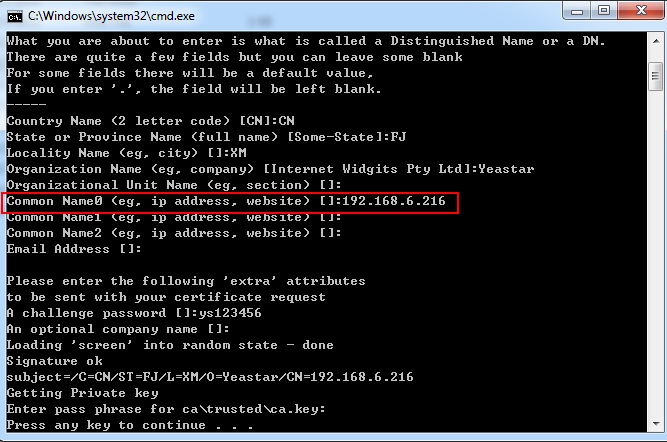
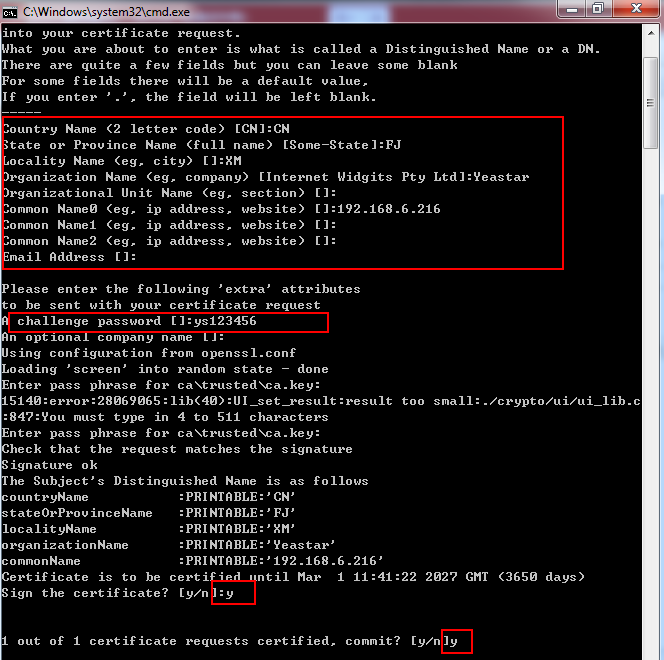
- Press Enter and input each information for S100 step by step. The most important field is Common Name. Set the Common Name0 to the IP address of S100.
- Set a challenge password.
- Enter the password of the ca key.
- Press any key to exit.
- You will see a ca.crt file and a ca folder created automatically in the folder /TLS_CA_Tool.
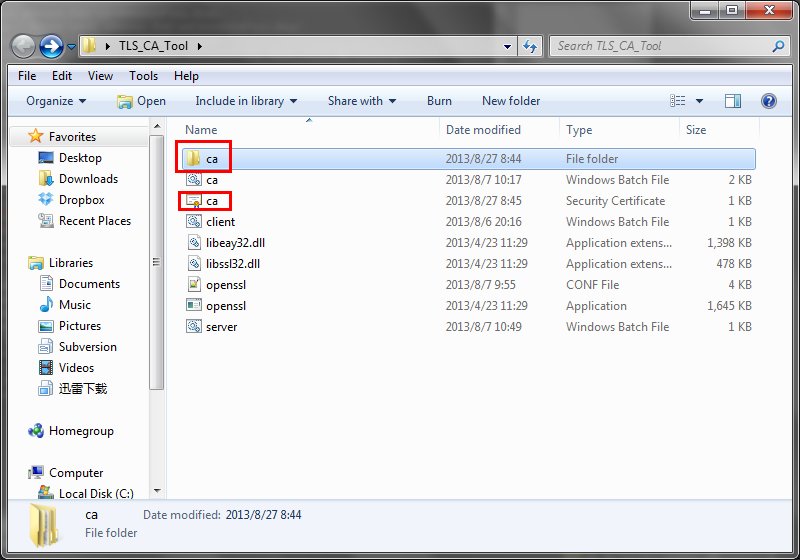
Note: you can find another ca.crt in the folder /TLS_CA_Tool/ca/trusted/, these two files are the same.
Step 2. Prepare S100’s server certificate: asterisk.pem.
- Double click server.bat.
- Enter the same information as you set in the S100’s ca.crt file.
- Enter y to confirm “Sign the certification”.
- Enter y to commit certification.
- Press any key to exit.
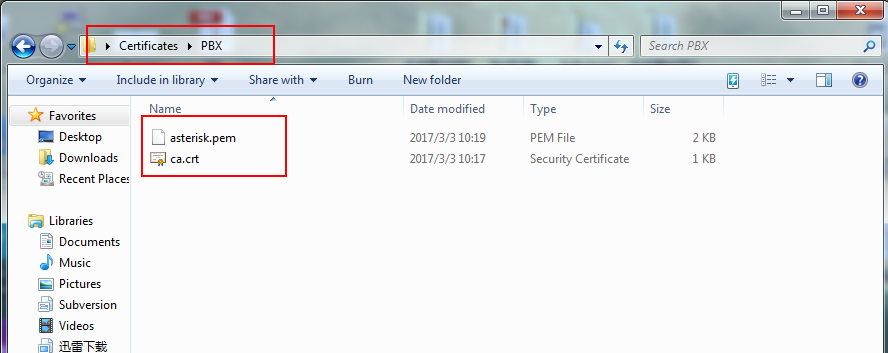
- You will see asterisk.pem file in the folder /TLS_CA_Tool.
- Copy and paste the ca.crt and asterisk.pem files to the folder /Certificates/PBX in case the ca key will be rewritten in later steps.
Preparing Certificates and Keys for Yealink Phone
Step 1. Prepare IP phone’s CA key: ca.crt.
- Double click ca.bat file, set a password for the ca key.
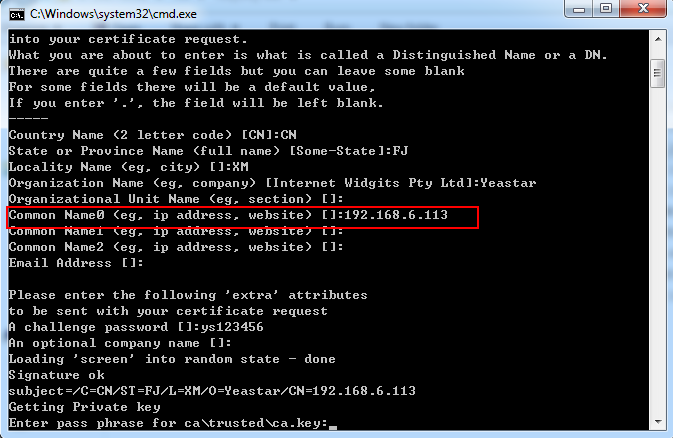
- Press Enter and input each information for the IP phone step by step. The most important field is Common Name. Set the Common Name0 to the IP address of the IP phone.
- Set a challenge password.
- Enter the password of the ca key.
- Press any key to exit.
- You will see a ca.crt file and a ca folder created automatically in the folder /TLS_CA_Tool.
Note: you can find another ca.crt in the folder /TLS_CA_Tool/ca/trusted/, these two files are the same.
Step 2. Prepare IP phone’s certificate: client.pem.
- Double click client.bat.
- Enter the same information as you set in the IP phone’s ca.crt file.
- Enter y to confirm “Sign the certification”.
- Enter y to commit certification.
- Press any key to exit.
- You will see client.pem file in the folder /TLS_CA_Tool.
- Copy and paste the crt and client.pem files to the folder /Certificate/Phone.

Configuring S100 with TLS
Step 1. Upload the trusted certificate.
- Log in S100 web user interface, navigate to Settings > System > Security > Certificate.
- Click Upload, choose type as Trusted Certificate.
- Click Browse, choose IP phone’s ca.crt, then click Upload.
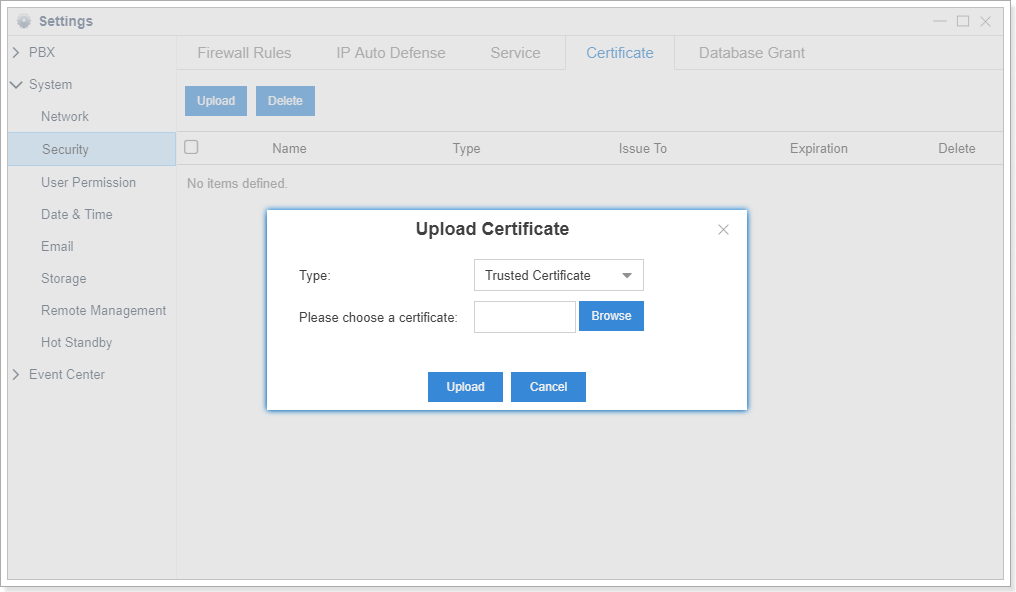
Step 2. Upload the PBX certificate.
- Click Upload, choose type as PBX Certificate.
- Click Browse, choose PBX’s asterisk.pem, then click Upload.
- Click Yes on the pop-up window to reboot the PBX.
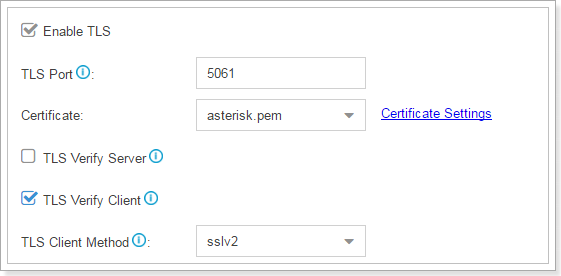
Step 3. Enable TLS on S100.
- Navigate to Settings > PBX > General > PBX > TLS.
- Check the checkbox of Enable TLS.
- Select the asterisk.pem certificate.
- Check the checkbox of TLS Verify Client. S100 will verify IP phone’s certificate, the common name inside CA should be the same as its IP or domain name.
- Select the TLS client method.
- Click Save and click Yes on the pop-up window to reboot the PBX.
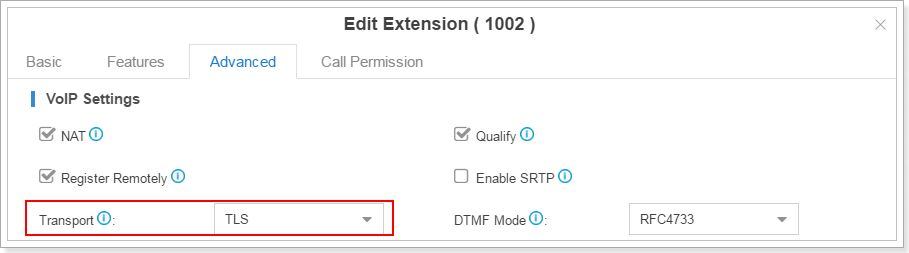
Step 4. Set up a TLS extension.
Go to Settings > PBX > Extensions, choose an extension and edit it, set the transport as TLS.
Configuring Yealink T46G with TLS
Step 1. Upload the trusted certificate.
- Log in Yealink web interface, navigate to Security > Trusted Certificates.
- Click Choose File, choose S100 PBX’s ca.crt.
- Click Upload, you will see the uploaded certificate on the page.

Step 2. Upload the server certificate.
- Navigate to Security > Server Certificates.
- Click Choose File, choose IP phone’s client.pem.
- Click Upload, you will see the uploaded certificate on the page.
- Set Device Certificates to Custom Certificates.
- Click Confirm.

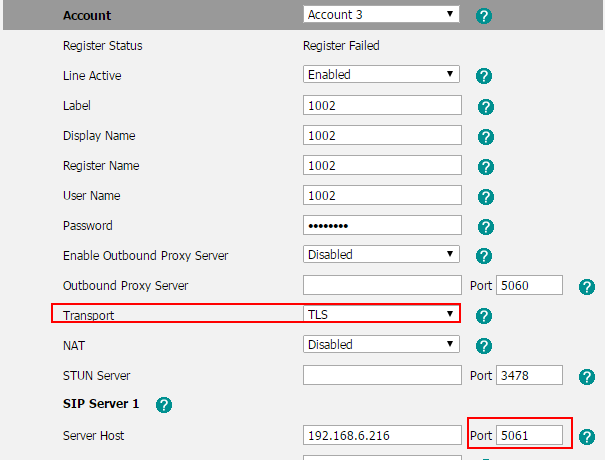
Step 3. Register the TLS extension.
- Fill in the extension details.
- Choose transport as TLS.
- Set server port to 5061.
- Click Confirm and check the extension status.
0 Comments