Registering Cisco SPA Series IP Phone to Yeastar S-Series Manually
- Start up the phone and check IP address. Press the menu key, go to the “Network” option and press “Select”.
- Type the phone IP address in your browser, click “Enter” key to access the phone’s web user interface.
- Click “Admin Login” link, and next click on the “Advanced” link at the top of the page to the phone’s advanced administrator page.

- Choose one account to configure. Here we click “EXT1” to configure account 1. Configure the account as follows:
- Set the “Line Enable” field to “yes”.

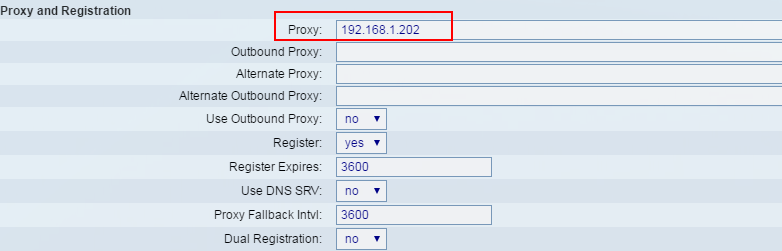
- In the “Proxy and Registration” section, set the “Proxy” field to Yeastar S-Series PBX’s IP address.
- In the “Subscriber Information” section:

- Display Name: set the name you want to appear on other phone’s display when calling other phones.
- User ID: fill in the extension number.
- Password: fill in the extension’s “Registration Password”.
- Use Auth ID: set to “Yes”.
- Auth ID: fill in the extension’s “Register Name”.
- Set the “Line Enable” field to “yes”.
- In the “Dial Plan” section, set the “Dial Plan” field to “[x*].” (without the quotes).

- Click “Phone” tab and set the “Voice Mail Number” field to “*2”. The default “Check Voicemail” feature code on S-Series PBX is *2.
- Adjust the audio parameters. Click “SIP” tab and in the “RTP Parameters” section, change the RTP port range to 10000-12000, and set the “RTP Packet Size” to 0.020. (The default RTP port range in Yeastar S-Series PBX is 10000-12000).

- Click “Submit All Changes” at the bottom of the page. Your phone will restart. After rebooting, the phone will register to Yeastar S-Series PBX. You can check the extension status on S-Series “PBX Monitor” page.
Configuration for Remote Extensions
If you want to register a remote extension on Cisco IP phone, you need to set the “Proxy” field to the Yeastar S-Series PBX’s public IP address, and also configure the following settings.
- Click one EXT account to configure the account settings.
- Go to the “NAT Settings” section.
- Set the “NAT Mapping Enable” field to “yes”.
- Set the “NAT Keep Alive Enable” field to “yes”.

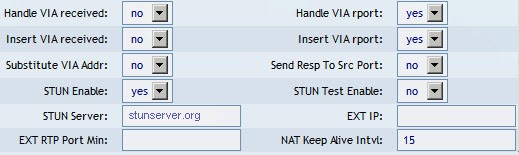
- Click “SIP” tab, go to the “NAT Support Parameters” section.
- Set the “Handle VIA rport” field to “yes”
- Set the “Insert VIA rport” field to “yes”
- Set the “STUN Enable” field to “yes”
- Set the “STUN Server” field to “stunserver.org” – to allow the phone to discover its external IP Address, and the port mappings that will be applied to the traffic sent and received by the phone.
- Click the "Submit All Changes" button at the bottom of the page. Your phone will restart.
0 Comments