If you choose to register Yealink to Yeastar S-Series manually, you have to log in each phone, and configure one by one.
Step 1. Log in the Yealink IP phone web user interface.
- Username: admin
- Password: admin
Step 2. Click “Account” Tab, choose an account to configure.
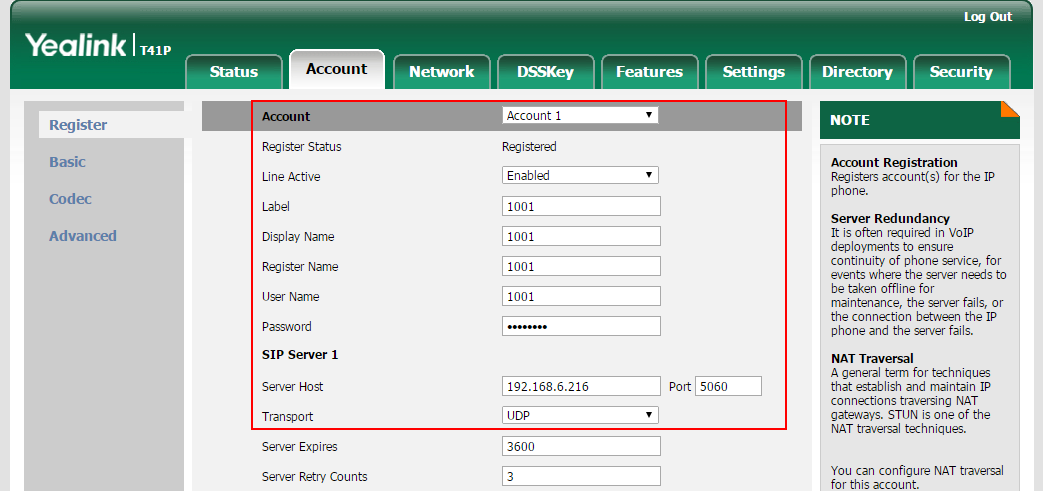
- Account: choose one account.
- Line Active: Enabled
- Label: set the name you want to appear on the phone display.
- Display Name: set the name you want to appear on other phone’s display when calling other phones.
- Register Name: fill in the extension’s “Register Name”.
- User Name: fill in the extension number.
- Password: fill in the extension’s “Registration Password”.
- Server Host: fill in Yeastar S-Series PBX’s IP address.
Step 3. Click “Confirm” and check the extensions status.
If the extension is registered to Yeastar S-Series successfully, the “Register Status” will show “Registered”.

0 Comments